

Changing an ostomy appliance doesn’t have to be complicated, but there are a few things you’ll want to do in order to do it right.
Table of Contents
Intro to Changing Your Ostomy Appliance
The following steps assume that you have an uncomplicated stoma and use a regular one or two-piece appliance.
This guide should be helpful to all ostomates (urostomates, ileostomates, colostomates), although some steps may need to be tweaked/omitted depending on the stoma type.
The most common optional steps have been listed, although there are many more special steps that some ostomates may need due to a complication or difficult stoma.
Disclaimer: As always, I suggest speaking to a stoma nurse if you are having problems with your stoma or ostomy appliance.
If you’re a new ostomate you may not know when to change your appliance. You’ll get better with experience, but I do have a guide to help HERE.
Video (recommended)

By playing the above video you agree to YouTube's Terms and Conditions and Privacy Policy
Supplies used in this video include:
- Perfect Choice Barrier Ring (BR1001)
- Hollister New Image Pouch (#18183)
- Hollister New Image Wafer (#14603)
- Niltac Adhesive Remover wipes (TR102)
- Niltac Adhesive Remover Spray (TR101)
Preparation
Preparation is an important step that helps to keep stress levels down and provides you with a clean and organized workspace.
This includes gathering any supplies you’ll be needing as well as making sure that you don’t have anything urgent to get to during the next hour or so.
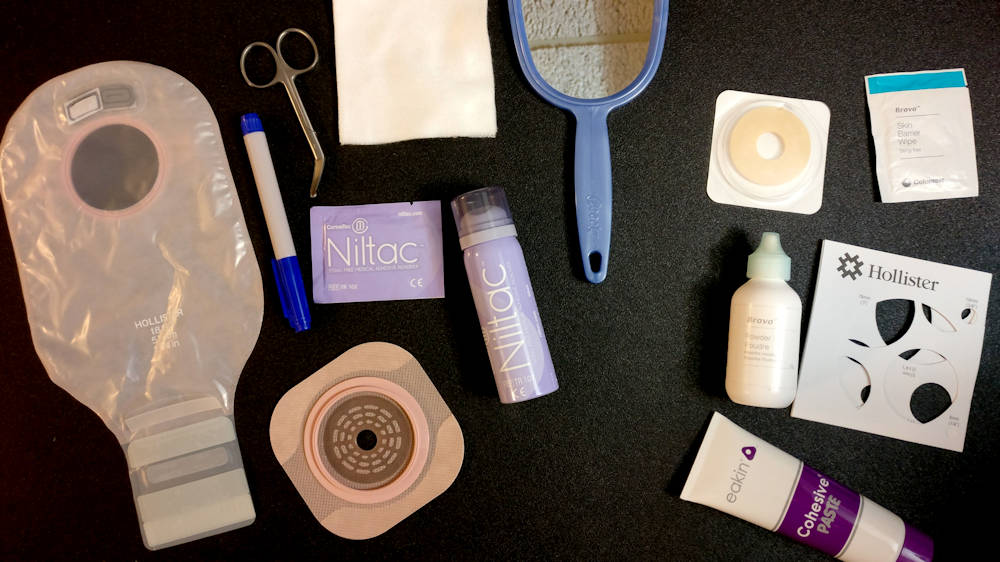
Here are supplies I tend to always have on hand when doing an appliance change:
- Stoma bag and wafer (or just a bag if it’s a one-piece appliance). Obviously, this will be required!
- Adhesive remover spray and/or wipes. Absolutely necessary if you find that your appliance or other supplies are difficult to remove from your skin.
- Ostomy scissors. These are only necessary if you are cutting your wafer, so there’s no need for them if you use a pre-cut or moldable wafer. I recommend this pair from Coloplast (Amazon.com affiliate link)
- Small bag to dispose of soiled supplies and to catch any output that comes out while I’ve got my appliance off. “Kitchen catcher” bags tend to be perfect for this.
- Mirror. This can either be a small, pocket mirror or one that sits on the bathroom sink. Make sure to use one that stands on its own, preferably one that can be adjusted.
- Gauze or paper towels. I use gauze to clean around my stoma, to make sure my stoma is dry before putting my appliance on. I prefer using gauze over toilet paper or paper towel because it doesn’t stick or break apart easily (my insurance covers gauze, so that helps).
- Pen or marker. If you are cutting your own wafer then this will be handy, although not absolutely necessary.
- (optional) Stoma measuring guide. Makes measuring your stoma easier if you use cut-to-fit wafers.
- (optional) Tampons(!). I’ve had more than a few people (with either a urostomy or ileostomy) tell me that they use tampons to absorb urine/output while cleaning around their stoma. This can be an alternative to using gauze.
- (optional) Barrier rings, barrier wipes, stoma paste, adhesive, protective sheets, etc. Not everyone needs these, but if your nurse has told you to use them, then you’ll want these easily accessible during your appliance change.
- (optional) Gelling products, pouch deodorants, wafer extenders.
Steps to Changing Your Appliance
- Get supplies ready. It’s important to get everything ready before you start because it’ll help things to go smoothly and it’ll keep the stress down. If you don’t have a lot of counter space in your bathroom, invest in a hanging toiletry bag to keep your supplies in for easy access.
- (Optional, but highly recommended). I hang a bag under my stoma to catch any output during my change. It also makes it easier to dispose of soiled supplies. You can use plain “kitchen catcher” bags, or you can even find similar bags that are scented to help mask any odors during your appliance change.

- Gently remove your old appliance. Be careful not to pull your wafer off too fast, or you may damage your skin. If you find that you often have a lot of adhesive residues left on your skin or the wafer doesn’t come off very easily, try using an adhesive remover.

- Clean and dry the area around your stoma. You can do this with just plain water, but avoid using soaps with moisturizer if you do use soap. If there’s any residue on your skin, use an adhesive remover wipe to gently get rid of it, then rinse with water and dry. It’s really important that your skin is dry before applying any other products, including your wafer.

- Shave if needed. Allowing hair to grow under your wafer can cause leaks, irritation, ingrown hairs, and can itch. Guys with hairy stomachs may need to do this with every appliance change, and some women may find that shaving any fine hairs makes removing the wafer easier. For a guide to shaving around your stoma, please check out THIS guide.

- Measure your stoma and cut a hole in the wafer. Since stomas can change their size and shape, this step is something to consider. You can skip this step if you use a moldable or pre-cut appliance. It’s important to make sure that you do this properly, and if you’re having trouble then I have a separate guide you can read HERE.
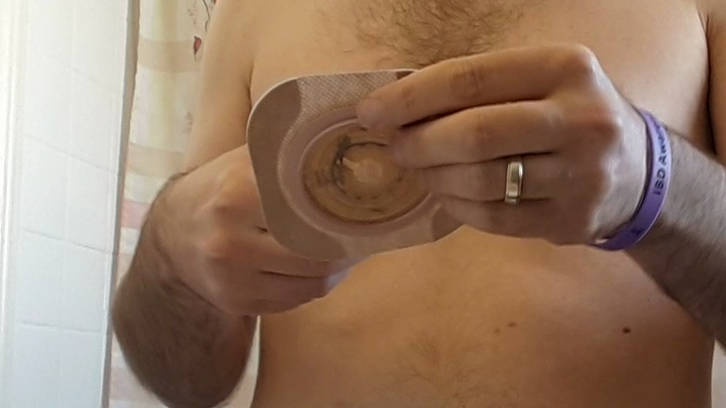
- (Optional) Apply barrier products, stoma powder, etc. If you use any other supplies, you can apply them to your skin now. As a side note, don’t use extra supplies just because you can – more often than not, less is better!
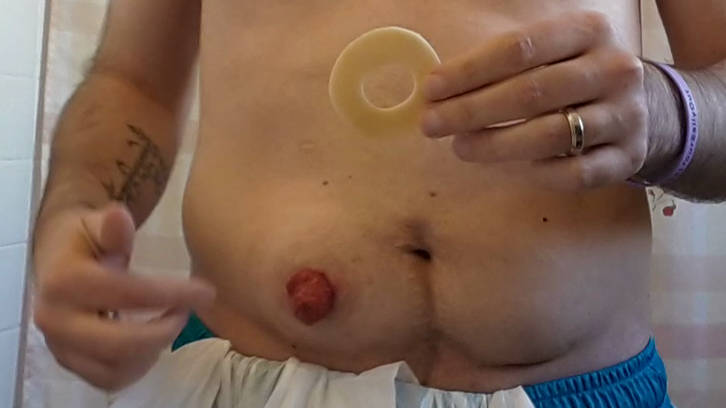
- Do a “Dry run” to make sure the appliance is cut right. To do this, place your wafer over your stoma without removing the back liner. Check to make sure that everything has been cut properly, and it fits around your stoma with enough of a gap. Adjust the hole that you’ve cut in your wafer if you need to.

- Remove the liner from the wafer and apply the new wafer to your skin. If you’ve got a two-piece, then attach your bag after applying your wafer. One suggestion that I would make during this step is to dry your stoma with some gauze so that it’s not really wet or leaking; any moisture that comes in contact with your wafer will cause it not to stick.
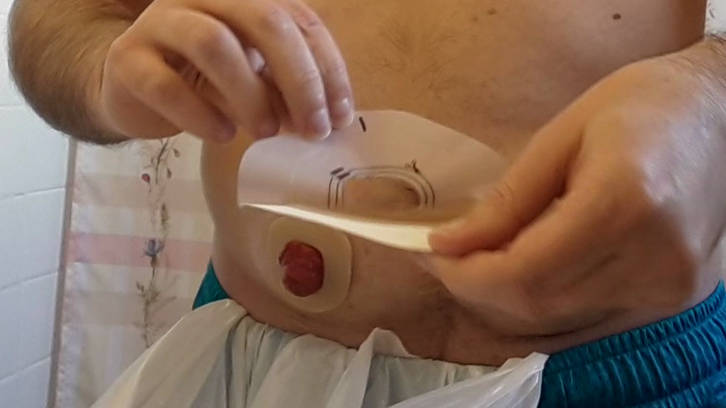
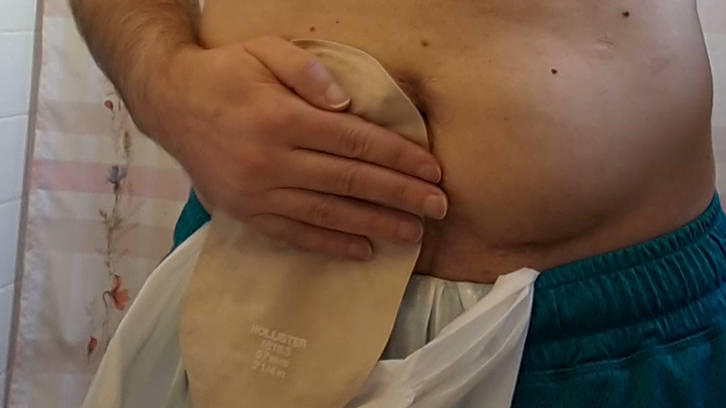
- Use your hand and apply gentle but firm pressure over your appliance for about a minute. The heat and pressure will help the adhesive to work better. I often find that having a hot shower AFTER putting on my appliance causes the adhesive to bond even better with my skin (resulting in longer wear times).
- (Optional) Add pouch deodorant and/or gelling products to the bag. If you’re using a one-piece or a two-piece with a closed-ended bag, you’re going to want to do this step before applying your wafer or bag.
- Clean up. And you are done!
This entire process can take five minutes or an hour. Go at your own pace – the goal is to wear an appliance that’s reliable, not set any land speed records!
Tips for Active stomas (ileostomy/colostomy)
One of the biggest challenges you might face when it comes time to change your appliance is an active stoma.
Having a stoma that’s constantly outputting will make pretty much all appliance changes more difficult.
Here are a few suggestions to help with that:
- Time your appliance changes. You may notice that your stoma is less active during certain parts of the day. Try to schedule your appliance changes during those times.
- Don’t eat/drink before an appliance change. Eating and drinking stimulate the peristalsis in your gut (it gets things moving!), so you’ll want to avoid eating/drinking a few hours before changing your appliance.
- Imodium. Some ostomates will use Imodium, or something similar, to slow down their bowels before an appliance change.
- Marshmallows. Many ostomates swear by this, but eating marshmallows can slow down your bowel movements. You can find vegan marshmallows on Amazon.com (Affiliate link).
- Laying down. I don’t recommend this, as it creates some other challenges during your appliance change, but some people might find that their stoma is less active when they are laying on their back.
Tip: If you’re having a problem with liquid output, then you may find THIS guide to be helpful.
Conclusion
I hope this guide has given you some direction on how to change an ostomy appliance.
Each person, stoma, and situation are different, so adjust these steps as you see fit.
I encourage you to also visit a stoma nurse so they can see how you’re changing your appliance and possibly offer ways to improve upon it.
Good luck!
Remember, if you’re having difficulty with your appliance, you should speak with an ET Nurse, who can guide you through specific techniques for your skin and body shape.
Question: Do you have any tips to share for pouch and wafer changes?



My pouch does not have a filter, just a plain old pouch.
@iebrowneHi iebrowne,Mine is a two-piece, with no filter. If there is not enough air I open either the snap- together (where the bag joins the flange) or the bottom (where the bag empties) and let a little air in. If you have a two-piece, empty-able system, that can work. But I still get some pancaking, which is annoying – one day somebody will invent something to solve that, I hope!
@iebrowneWelcome to this amazing site! Merry Christmas🎄 and Happy 2020🥳🎆 to you and yours. If you live in my neck of the woods feel free to bring me back some Vanilla…lol. I have an ileostomy. When I deal with pancaking it is usually because I am not drinking enough fluids before, during or after a meal. or the filter is actually working. Could this be an altitude issue for you? I wear a one piece and it has a filter. The first 2 – 3 days I have suction issues and some upper accumulation of output. I have learned to put some tape over the filter till about the 2nd. or 3rd. day. By then it is usually clogged a bit and won’t work as well. The filter gives my arthritic hands a chance to rest. *I also use the liquid gel deaoderant in my pouch right away and then the regular liquid the rest of the time. I smoosh it between the layers of plastic and then rub it up and around to make for a more slippery place for the output to go down. I find smooshing it around to the top of the pouch helps a lot. I have never tried the TP trick but I find this gel deaoderant works well for slipping output down where it belongs. Plus, it gets a bit into the filter and then air can not escape so easily. To help a bit with clearing the filter, I take a square of TP and fold it over the filter and the back of the upper pouch and squeeze it, then slide from right to left a few times to squish some of what blocks the filter our of the filter area. I once cut a pouch apart to see how the filter works and noticed the little bits of plastic framing the filter. Most filters if you get 2 good days and a 3rd. mediocre day out of it, your lucky. But I put the squeeze on and it seems to help it work a bit longer to keep it working. I also put the Osto EZ Vent on my pouches and use that to let air in or out as needed by pulling the sides gently apart but not by the vent. But I still find the gel deoderant keeps the output moving. I put it in after every empty time also. It comes in an individual measure amount. To keep the gel up into the bag and not around the opening at the bottom, I will slip the little packet in the pouch just past the neck and squeeze it a out from there thru the little spout area in the packet. I always rinse my pouch too, this helps for a clean little packet when I take it out. Could it be your clothes may he a bit snug¿ I hope you find a solution that works for you! All the best. Linda
@dlkfiretruckHi Linda,Thank you for your suggestions, I am so glad I have joined this group, everyone certainly tries to help one another.I live in Vernon, BC back there in April from Mexico, so what neck of the woods do you live in?
Hi iebrowne, Welcome here, does your bag have a filter, these can be responsible for sucking in and can be blocked off with the little stickers. To create some space try some toilet paper in the bag.
This is my first post as I have just joined the forum. Has anyone ever had a problem with not enough air in the pouch after a change? The air get sucked out which results in pancaking for a totally different reason,
@iebrowne
Welcome to the forum!
John is correct that it’s the filter causing this problem. I make note of this in my “pancaking" article here: https://www.veganostomy.ca/pancaking-ostomy-tips/#Check_Your_Filter
@veganostomyThank you for your reply, however I do not use a filter.
@iebrowne
If you aren’t using a filtered bag, make sure you start with a little bit of air when changing your appliance (or after emptying it) or roll up a wad of toilet paper and that will create a gap between the walls of your bag to prevent pancaking.
Let us know if that helps.
Hi,Thanks for your reply. The issue seems only when I change my appliance, I have tried everything ( blowing air into the pouch, putting tissue in it ) and nothing is working.I had been using Convatec pouch 401521 with a 401754 flange. Until I discovered a more comfortable flange 413165. However the issue seems to be with 413165 I wonder if they are not compatible?The only problem is that I in Mexico for the Winter and have a large supply of the new product so I have to find a way to make it work, as the product is not available here in Mexico.
Eric, Thanks for this video. I used the bag hanging method and stood in front of a mirror on a stand on the countertop. It will take a bit to learn to do things watching in the mirror but I could see under my stoma so much better. The stoma nurse had me put the wax barrier on the wafer before applying it and I used your method today and I think I was able to do a better job this way. I guess time will tell if so…. My stoma still hasn’t completely healed so it is a bit harder to measure and get the size just right.
Again, thanks for all the time and effort you put into this site.
Alice
Is Niltac still in business? Their webpage has no contact information, and when i send an email it just bounces back an error? Those 2 products would be awesome as the adhesive from hollister is tearing my skin up.
Niltac was a Trio brand, but is currently owned by ConvaTec. I still have access to those products though my supplier (I order them every few months), but if they aren’t available for you, try the Sensi-Care brand, which is the exact same product under a different name.