
A crucial skill that anyone with an ostomy should know is how to measure their stoma. Not only does it help to prevent leaks, but it can help to extend appliance wear time, and save your skin!
This guide will explain what supplies you’ll need, as well as show you how to properly measure your stoma and cut your wafer.
Tip: If you are a new ostomate then it’s very often recommended that you measure your stoma with every appliance change for at least the first month to six weeks. That’s because your stoma will be shrinking during that time.
Table of Contents
Video

By playing the above video you agree to YouTube's Terms and Conditions and Privacy Policy
Who This Guide is For
Ostomates who will benefit the most from this guide are ones who have an uncomplicated, round-ish stoma that is slightly protruded.
The process is very similar for ileostomates, colostomates, and urostomates who use cut-to-fit appliances.
If you have a recessed, flushed, or prolapsed stoma, then you may not get perfect results by following this guide.
Things to Note
You would think that putting together a guide on how to measure a stoma would be pretty straight forward. Unfortunately, there are a few things that make this difficult:
Loop vs. End Ostomy
Due to the “double-barrel” nature of a loop ostomy, it may not be possible to measure the stoma using a circular guide.
If you have a loop ostomy, you may need to be creative about how you measure your stoma. One suggestion is to use a half circle, rather than the full circle of the measuring guide and measure each part (or each half) of your stoma separately. You can then trace that onto your wafer.
Every Wafer is Different
Not all wafers will act the same when they are worn. While all wafers tend to swell a bit as they come in contact with fluids or output, the degree in which they swell can differ from brand to brand.

Because of this, you may need to cut your wafer slightly larger to accommodate the expansion. Doing this also helps to prevent the wafer from “strangulating” your stoma by putting too much pressure around it.
Another thing about wafers is that they come in all kinds of sizes and materials. When I buy wafers, I try to get a size that allows for about 1cm of space between my stoma and the edge of the cutting lines (or up to the flange ring on my 2pc system).
If you use a wafer that doesn’t give you enough space, you may end up having difficulties cutting it, or worse, develop leaks.
There’s no harm in getting a wafer that larger than you need, and you may be able to get more pouch support because it has more surface area to stick to.
That is, of course, provided that a large wafer fits well on your skin (there is such thing as having a wafer on that’s too big!).
Stomas Can Change
As our bodies change and so do our stomas.
It’s expected that your stoma will change its size (get smaller) for the first four to six weeks after surgery due to the swelling that occurs post-op.
Likewise, weight loss/gain can change the size and shape of your stoma, and so can things like a prolapsed stoma or a hernia.
My stoma fluctuates between 28mm and 32mm at various times, despite being over three years out from surgery. Stuff like this happens!
While you won’t able to control or predict these changes, you can make sure that your wafer is cut as accurately as possible.
Info: For more information on why stomas can change their size or shape, please refer to THIS article.
What You’ll Need
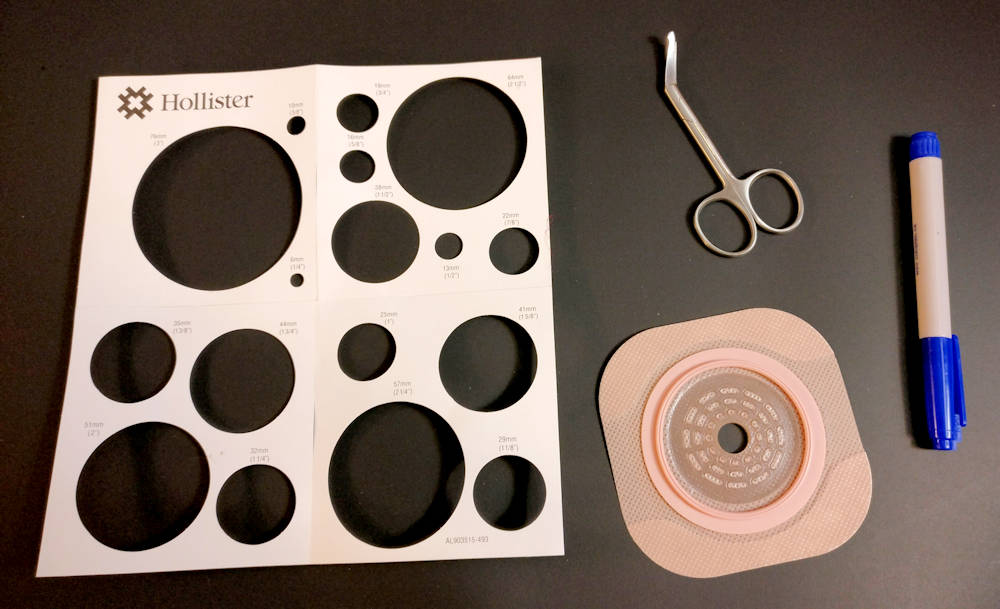
These are the supplies I like to keep on hand, but depending on the appliance you’re using, some of these won’t be necessary.
- Stoma measuring guide. If you’re using a cut-to-fit wafer, these will almost always come in the box of wafers.
- Ostomy wafer scissors (don’t use regular scissors, cuticle scissors, or anything with a sharp tip). I use and recommend THESE (Amazon affiliate link).
- Pen or marker for tracing.
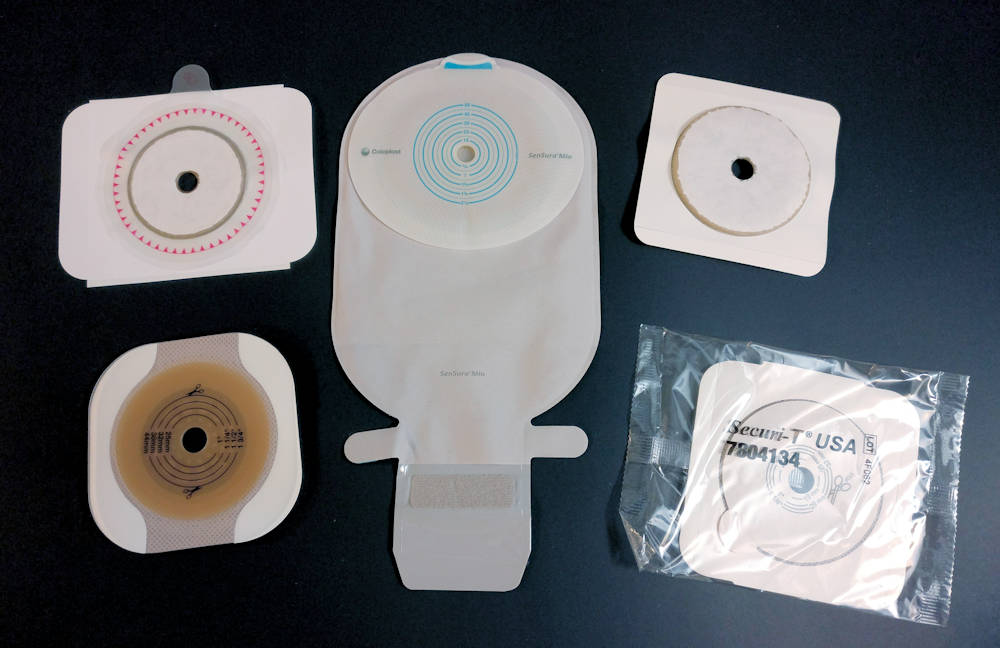
- Your wafer (obviously!).
- Gauze (optional) to dry your stoma. I prefer gauze over toilet paper/paper towel because the latter tend to break apart when wet.
- Mirror (optional, but recommended). This can help to see under your stoma while measuring it.
Some wafers will come with cutting lines printed on the back, while others do not. If your stoma is a consistent size, feel free to cut the wafer according to the cutting lines without the need to measure and trace the hole.
Steps to Measuring Your Stoma
- Gather your necessary supplies.
- Empty your bag and wash your hands.
- Remove your previous wafer then shave, clean, and dry the skin around your stoma.

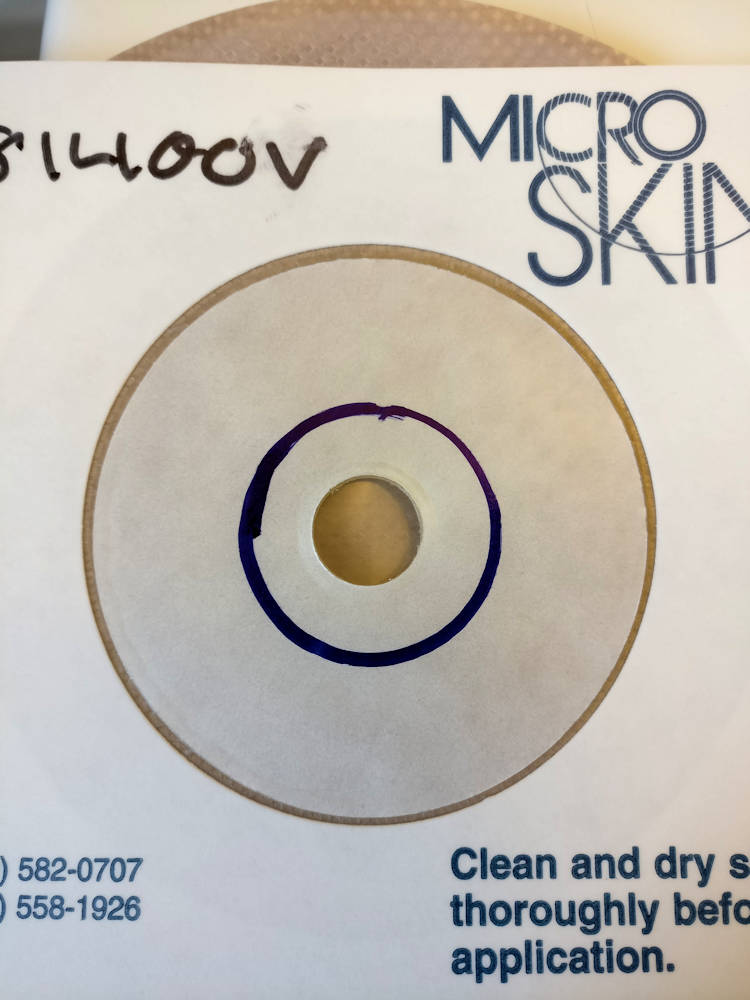
- Take your stoma measuring guide and find the approximate size of your stoma or use the previous measurement.
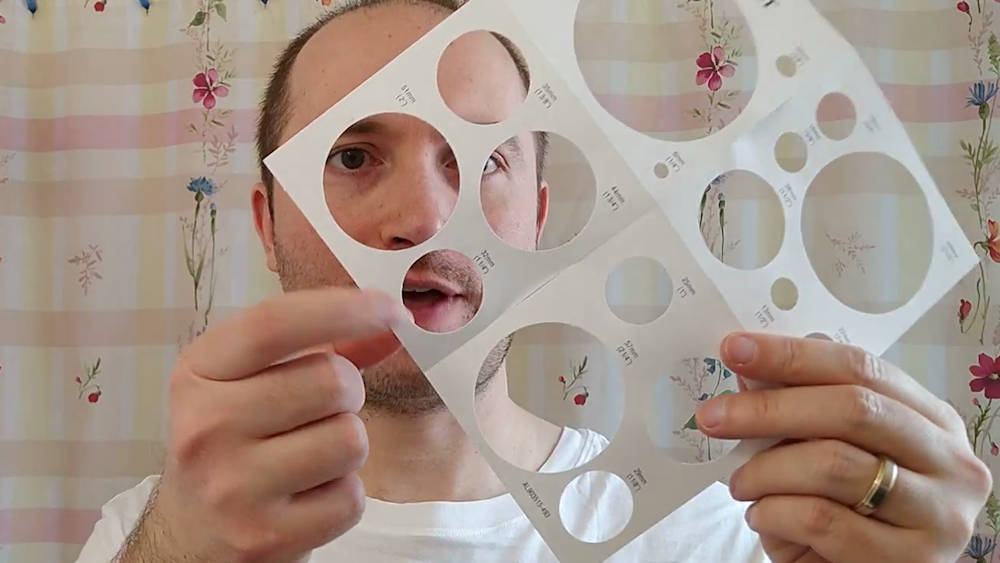
- Place the guide over your stoma so that your stoma goes through the hole.

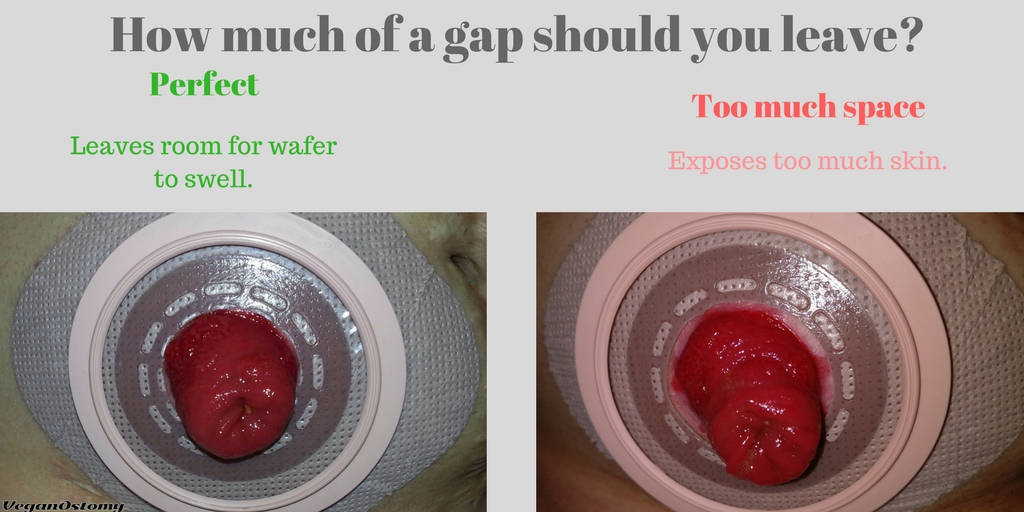
- You’ll want to make sure that there’s about a 1/16 – 1/8″ (approx. 1.5 – 3mm) gap between your stoma and the edge of the hole. Remember, as wafers do swell, you may need to adjust this gap accordingly. If you are using a barrier ring or similar product, it’s ok to cut the hole slightly larger (but not too much!).
- After finding the right size, place the measuring guide on the backside of your wafer with the hole in the center of the wafer. In certain situations, like when you’ve got surgical wounds or skin problems, you may need to place the hole off-center. If you do this, just be sure that you are still cutting the hole within the boundaries of the “maximum cut” ring.

- Trace the hole on your wafer using a pen or marker.
- Cut out the hole using ostomy wafer scissors. If you are using a one-piece appliance, blow into the bag first to give some space for your scissors to move.
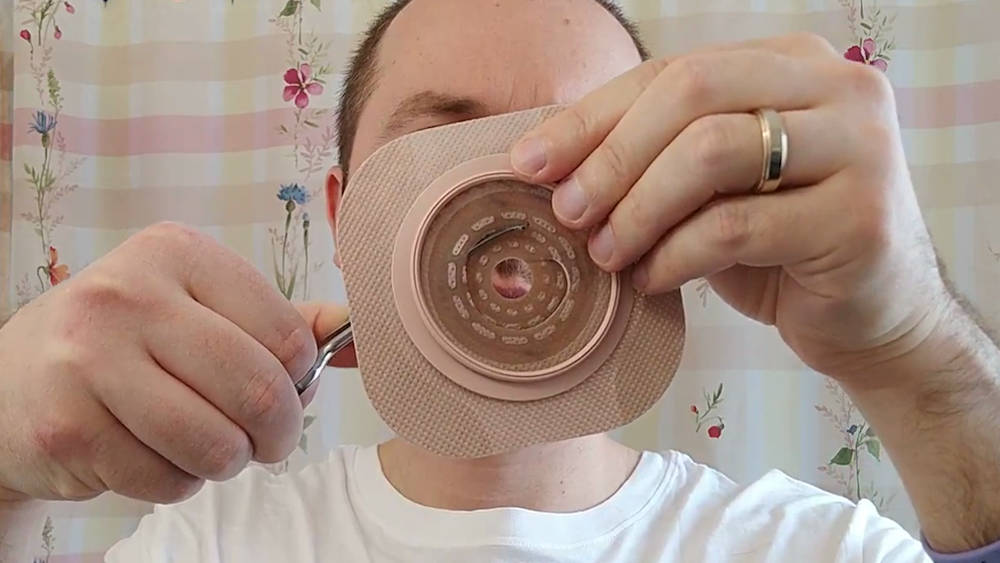
- Test the size of the cutout by placing it over your stoma before you remove the plastic liner on the back of your wafer. Be careful as the edge of that hole may be sharp while the plastic backing is still on.

- Make any adjustments if required.
- Complete any other skin routine, including putting on a barrier ring, ostomy paste, ostomy powder, barrier wipes, etc.
- Apply your wafer.
Tip: Keep the plastic liner from your wafer and use it as a template for your next appliance change. If your stoma stays consistent, then it will be easier to use compared to the paper measuring guides.

You can use your old release backing as a new template, but test it around your stoma to make sure it’s still the ideal size.
Final Words
I hope that this guide has given you some insight on how to measure and cut the hole for your stoma.
Feel free to make small adjustments to these steps in order to accommodate your particular needs.
Question: Do you have any tips to share about measuring your stoma?


Also please note, I learned this at the hospital after my surgery from a WOCN (Ostomy nurse) they changed it every other day and always this same way; although they never measured it standing up- only the smallest measurement counts really 🙃