

Barrier rings can help to prevent ostomy leaks, but most barrier rings get gooey and melt. Brava Protective Rings are Coloplast’s solution to this problem. But do they work?
Disclosure: All products used in this review were purchased by me through a local ostomy supplier.
Table of Contents
Video Review

By playing the above video you agree to YouTube's Terms and Conditions and Privacy Policy
About Brava Protective Rings
The products listed below were used for this review. Other sizes are available.
Product name: Brava Protective Ring
Manufacturer: Coloplast
Product #: 12037
Dimensions: 27mm stoma size, 2.5mm thick.
Quantity per package: 10, single-use
Product name: Brava Protective Ring
Manufacturer: Coloplast
Product #: 12047
Dimensions: 27mm stoma, 4.2mm thick.
Quantity per package: 10, single-use

The Protective Rings come in an attractive box. 
The box slides open (which is awkward). 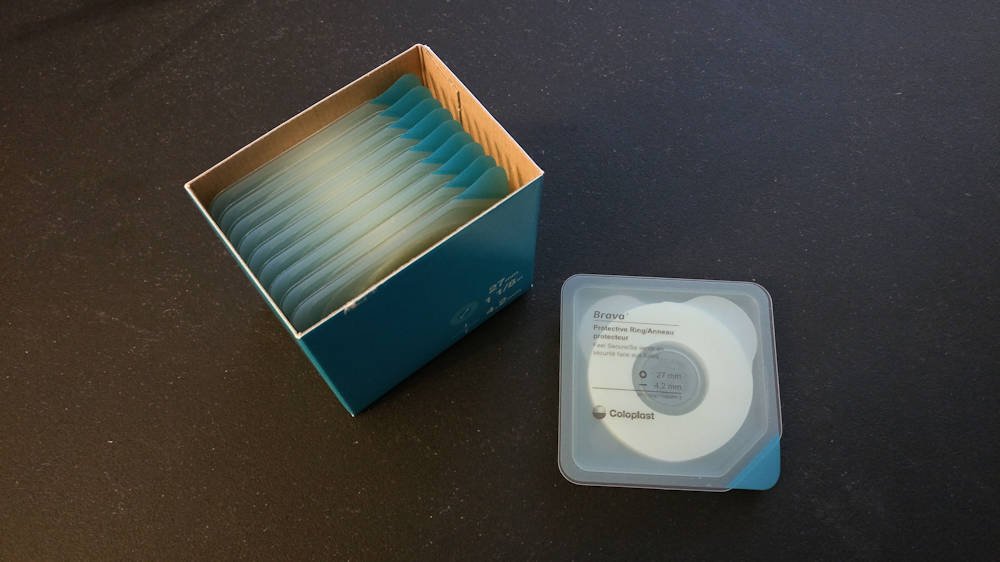
But the rings are kept neatly inside.
Part of the Brava line by Coloplast, these Protective Rings offer another option to prevent ostomy leaks and to get a better fitting appliance.
Info In the UK, this product is called “Brava Protective Seals”, not Rings.
Interestingly enough, Coloplast already offers a moldable ring product, but it seems that the Protective Ring will be replacing them eventually.
The advantage of using the Brava Protective Ring over the Brava Moldable Ring is pretty clear:
- They are more durable and less likely to “melt”.
- They are easier to handle and leave less residue.
- They are available in more sizes to fit the stoma better (currently 6 different options vs. 2).
- They come off the skin more cleanly.
These come in an attractive white and blue colored box that opens up by sliding the center part. I would have liked a traditional box that just opens on the top, but that’s just my preference.
Each Protective Ring comes in an individually sealed plastic packet, making them easy to travel with. There’s a little pull tab on one corner to open the packet. Inside, you will find the Protective Ring with plastic liners on each face (to protect it from sticking in the package). These come off easily.

Something that I really appreciate is the fact that Coloplast offers several sizes and thicknesses of Protective Rings to accommodate various stoma sizes and requirements.
Currently, the following sizes are available:
- 18mm / 2.5mm thick.
- 27mm / 2.5mm thick.
- 34mm / 2.5mm thick.
- 18mm / 4.2mm thick.
- 27mm / 4.2mm thick.
- 34mm / 4.2mm thick.
My stoma usually sits around the 30-32mm size, so I went with the 27mm ring, which can be stretched out. If you have a larger stoma, like one for a colostomy, then you have the option of going with a 34mm ring.
You can also go with rings that are either 2.5mm or 4.2mm depending on your needs.
I’m happy to report that Coloplast does not use animal ingredients in this product, which makes it suitable for vegans.
Using the Brava Protective Ring
The Brava Protective Ring works like most other barrier ring products and the instructions are the same:
- Remove the ring from the package by pulling on the blue tab.
- Remove the release liner from the face of the ring.
- Stretch it to the size/shape of your stoma.
- Either apply it directly to your skin, making sure that it’s snug around your stoma. Or, you can apply it around the hole on the back of your wafer (my preferred method).
- Proceed with putting on your appliance.

There are two release liners that need to be removed. 
You can apply the Protective Ring to the back of your wafer. 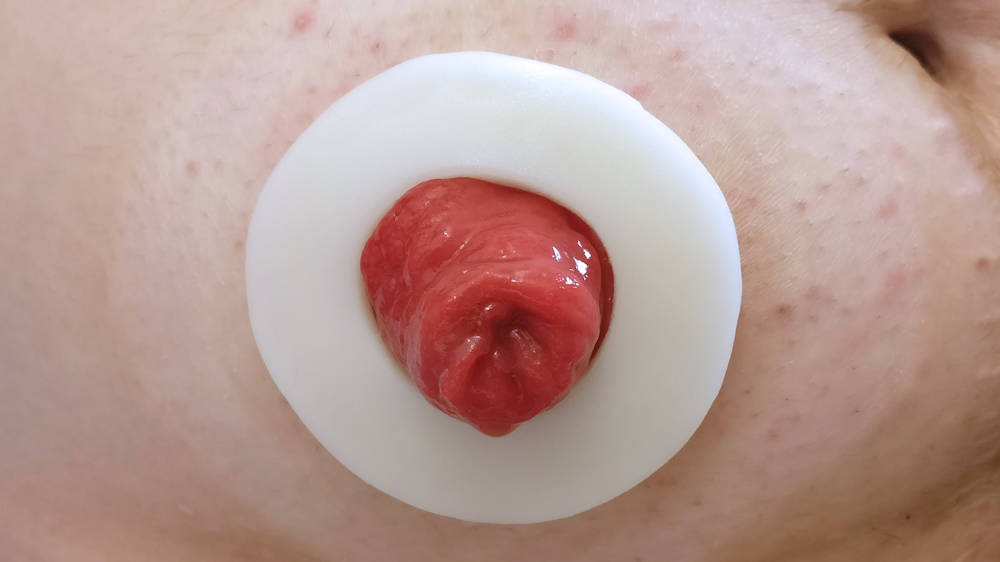
Or you can apply around your stoma.
Of note, the instructions also say that “If you use a 2-piece ostomy appliance, it is possible to apply Protective Seal directly to the coupling side of the baseplate, to achieve a snug fit around the stoma.” I did try this as I can see it coming in handy if you’ve cut your wafer too large, but I didn’t find this to be particularly effective as a gap would be left as my stoma expands and contracts with peristalsis – stick to sticking this under your wafer (no pun intended).
Speaking of filling gaps, if you were to cut your wafer a little too big, putting one of these Protective Rings under your wafer will help to protect your skin and fill in the space (see photo below for an example).

There’s really nothing special about removing the ring – I find that it comes off together with my wafer if I’m using an adhesive remover spray (which I recommend doing). You may decide to follow up by cleaning the skin to remove any residue, but it’s not really necessary unless you have to shave the area.
My experience with removing these rings is far better than with other products, which often tend to come apart or leave a sticky mess. This is a big improvement over the Brave Moldable Rings.
My Experience
Having sampled many different barrier rings from various brands, I will say that these are some of the best when as far as durability and ease of removal are concerned.
When it comes to actually handling the Protective Ring as you’re applying it, they are a bit sticky but don’t leave as much residue as other barrier ring products I’ve tried. And while I’d usually be washing my hands after handling a barrier ring, I didn’t feel the need to with these.
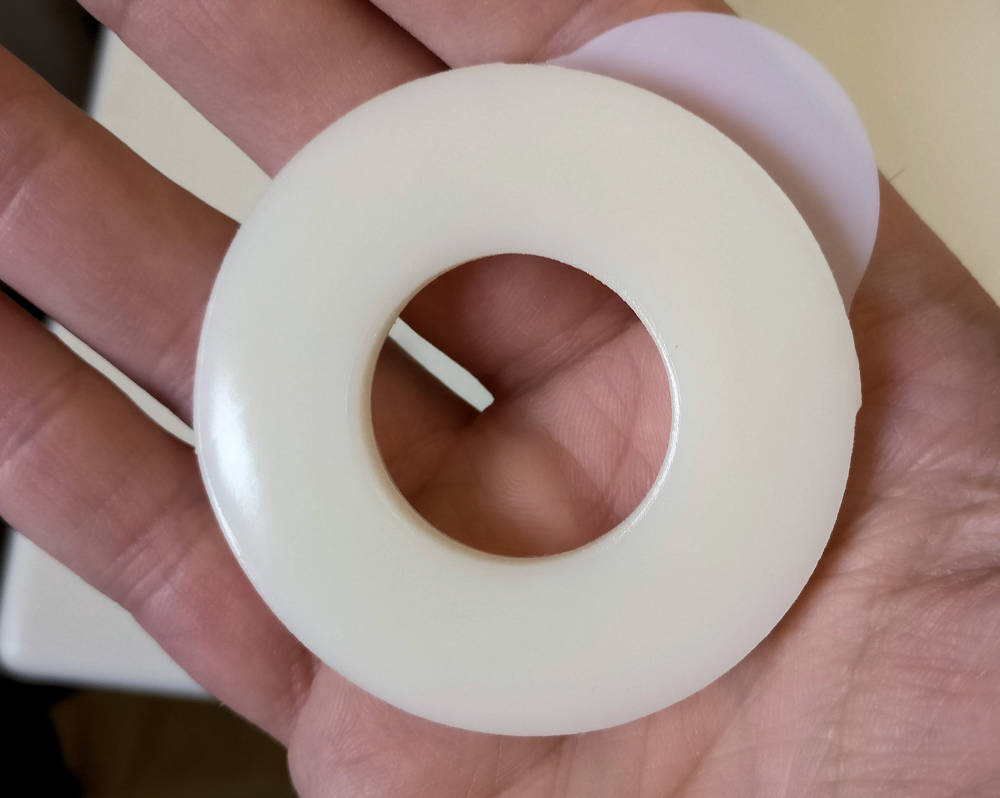
In my tests, I’ve worn these rings between two and six days of continual wear, and they don’t “melt” like I would have expected. Melting is the most common complaint from people who use barrier rings, and some products turn to mushy goo after a few days of wear.
Most surprising, however, is when it came time to removing my appliance. Usually, I would expect a sticky mess when using a barrier ring, but these come off pretty cleanly and together with my wafer (especially when you use an adhesive remover).
I won’t say that it’s perfect, though. There’s still a slight bit of residue left on the skin, but it’s mostly just tackiness – not globs of product you have to scrape off!
But do they work?
Obviously, if you’re using a barrier ring it’s likely to solve an issue with either leaks or to help fill in gaps under your appliance.
That said, I would say that my success with this product is about 70%.
I was sometimes able to get six days of wear without any leaks and minimal erosion of the product, and at other times I’d get a leak after two days. This is frustrating, to say the least, especially if the goal is to prevent leaks.
This inconsistency is something I’ve noticed with other barrier rings, including Eakin Rings, so it’s not really the fault of this particular product.
One possible reason for this is because my output is generally thicker, and barrier rings work better with thin or liquid output. That said, without a barrier ring I’m able to easily get 4+ days of wear that’s consistent and (mostly) trouble-free.
But just because these don’t work for me on a regular basis, doesn’t mean that I can’t use them off and on when my skin needs some time to heal. In fact, these are perfect to use if I have some damaged skin around my stoma, and I outline how I heal my skin in THIS article.
Conclusion
At the time of this writing (March 2017), a box of Brava Protective Rings sell for CDN$50-60 depending on the size. These are now available in Canada and the UK (Sold as “Brava Protective Seals”), but will be available in the US soon!
Samples are available from Coloplast and I would recommend you try a sample before purchasing a box just to make sure they work for your skin. I would also recommend sampling these if you already use a barrier ring product but have had trouble with excessive “melting” or removing it.
Most private insurance companies should cover these.
Pros:
- Can help to prevent leaks around the stoma.
- Available in multiple sizes and thickness’.
- Doesn’t “melt” like the Brava Moldable Rings.
- Leaves very little residue on the skin.
- Individually sealed.
- No animal ingredients.
- Can be applied to wafer or directly to your skin.
- Conforms to any required shape.
- Can be torn into a smaller size.
Cons:
- Inconsistent results (for me).
- Not available everywhere.
- Expensive.
Recommended
If you’re using the Brava Moldable Rings and find that they break down too easily or are difficult to remove cleanly, then the Brava Protective Rings will be a step up.
If you’ve used barrier rings and weren’t happy with how they worked, I would at least suggest giving these a try to see if you have a better experience.
Info: For more information or to request samples, please visit http://www.coloplast.us/ or http://www.coloplast.ca/ (If in Canada).
Question: Have you used this product?


Been using the Brava Protective rings for a few months now. Often with positive results, but also random failures.
I am a trouble shooter by trade, so I am doing it with my fairly new ileostomy. I inspect things when they are removed and try different ways to apply.
I notice that the Brava Protective ring does not adhere to the skin nearly as well as the Sensura Mio wafer that I use it with. I need adhesive remover spray to get the wafer separated, even after 5+ days, but the ring is pretty much already detached from the skin. It seems the ring depends mostly on it swelling out around the stoma to provide a seal. When I feel a stinging developing, I remove the appliance and can see that there is now a brown streak that has seeped under the ring. I guess after a certain amount of time, the ring has expanded to it’s capacity. Maybe it erodes after that and allows seepage.
I actually emailed Coloplast and noted the poor adhesion and asked if they had considered sandwiching a ring into a wafer scheme. The solid adhesion of the wafer with a ring between another layer. No reply about it.
I am now trying to perfect trimming the wafer to fit closer without a ring applied. Luckily I have a quite circular stoma. Day 4 without ring and good so far.
I am curious about pastes. How well they adhere. To both skin and wafer.
I am considering an experiment with applying the ring on top of the wafer. Trim the wafer up snug to the stoma. Then apply a ring on the wafer, around the stoma. Unfortunately this will require trimming the ring diameter down a lot, to fit inside the bag connection ring. Not a lot of ring left. Maybe try a larger diameter bag connector for this experiment.
@kedikat
A trick my ostomy nurse showed me was to put the ring on the wafer where it overlaps the hole and then tuck the edge of the ring thru the hole. You need to cut the wafer a little bigger if you do this.
I am far from an expert though. I get leaks frequently, though fewer this way.
I used paste a lot in the paste. The paste isn’t intended to stick, but rather to fill in crevices in the skin. I had about the same limited success with paste, but since it is harder to clean off the skin, I have been using rings exclusively.
Good Luck to you!!
@squeakyandliza
I was wondering about this. The concept seems to be that the ring swells out tight around the stoma. I thought I might be trimming the wafer too close to allow it to make a good turtleneck about the stoma. I did try to make a larger hole once. Not successful. But it may have failed due to other reasons. I see in the video review that the Brava Protective ring is noted for it’s lack of residual gunk to remove. That may be due to it’s lack of adhesion. I have some other rings that I will try. I will trade off more gunk to remove, for longer, secure wear time.
My no ring application started to burn tonight. Applied Sunday morning, started burning Thursday night. I removed the bag, flushed the wafer and applied powder into the space around the stoma. That relieved the burn\leak. But that will only last for a while. It did seem to be quite a successful application though. Four days at work in warm weather with a lot of exertion and constant bending at the waist as well as lounging about Sunday. I will try to get to Saturday morning till change.
I did notice that I made an incorrect observation. When I flushed the appliance tonight, I saw that it looked the same as if a ring were applied. I guess most of you know this already. But I have not noted ring or no ring results so far. The material of the wafer is all puffed\distorted, rotted looking. I thought that this was the ring material having squeezed up and out from under the wafer layer. But i see now that this is what happens to the actual wafer material. The ring may actually also be protecting from material leaking right through the degraded wafer layer. So I now have a plan to see if I can stop this from happening. I really want to get to regular a once a week change.
@kedikat
I photograph the stoma with a camera or phone with a ruler along side.
print it out 1:1 it should then be the exact size.
this can be checked by placing the ruler over the picture is should cover the image of the ruler very closely allow for camera lens distortion.
Ruler helps to identify (top)north of image you now have an exactly shape of stoma to cut out
surprise no company has developed this into a phone app or a special cameras that projects a laser grid or exact sizing for the stoma nurses. should be that hard these days. After all your phone has more computing power than the computer launched with the international space station!
@chrisandbagpus
Nice tip. Due to my work. I have a digital caliper. So I can measure that squirt to a thousandth of an inch. But folks can get a similar device for a lot less. Places like Home Depot sell much cheaper basic calipers. They have two fingers. One set and one sliding. With a ruler gauge on it. Slide the fingers together at the base of your stoma and see the results on the marking scale.
I use the Bravia Rings and have never had a problem with them sticking to my hands. I remove the paper liner, stretch to fit my stoma and apply to my skin around the stoma, Not the Wafer. Never had a problem this way. If you stretch the ring a little too big, it will shrink fairly quickly. Stick on the wafer then the bag. Warm with my hand 60 seconds and done.
Hollister Adapt, Safe N Simple and Eakin are very sticky and degrade quickly. That’s why I use Bravia.
Been experimenting more with ring application.
I am now cutting the ring while both sides still have the protective covering on. I then peel back some of the bottom cover and apply it. So I can press on the top to get it nailed down well. From then on it is a progression. Peel some more bottom back, press down. Peel a bit more top back each time too if required. The top cover may not allow enough bending to keep close to the stoma. Especially if you have a non circular shape. Or are quite a bit off from the precut diameter.
I have done this 3 times now and it seems to work well, if a bit time consuming.
I also made a little device on my 3D printer to help seal the whole deal. After the ring and base plate are attached I use a tube with a flange on the bottom to press the whole assembly down. The tube fits close around my stoma. The flange at the base fits just inside the hard ring of the 2 piece I use. The tube is about 2 inches long. I can now slip the tube over my stoma and apply hard pressure all the way from the inside of the appliance ring to right up to my stoma edge and hold it there for as long as I have patience. If my stoma farts or poops, it exits the tube away from things. I think this helps get a good seal.
I’m guessing the adhesive is temperature sensitive. Anyone prepared to put their hand in the fridge to test this theory ;-)
The Brava rings become softer and sticker the long you handle them is what I have noticed and after awhile under the wafer they melt and become very sticky leaving a yellow sticky residue which I remove with the adhesive remover spray.
They don’t work that well for me alter shape and position in an unpredictable way melting into the wafer, detaching from the skin?
Hi LL, Yep it’s normal and it’s what the ring does. It’s mopping up moisture and effluent. I have always thought that long term wear can be bad as this can then cause skin damage. I guess on a short stoma it could do what you say but have you seen any output under your wafer. Some rings swell more than others. Than the silicon rings don’t swell at all. The manufacturers say this is better for the skin. Again in the ostomy world it’s a case of what works for you do it and then again some one else will have a different experience.😀