
A crucial skill that anyone with an ostomy should know is how to measure their stoma. Not only does it help to prevent leaks, but it can help to extend appliance wear time, and save your skin!
This guide will explain what supplies you’ll need, as well as show you how to properly measure your stoma and cut your wafer.
Tip: If you are a new ostomate then it’s very often recommended that you measure your stoma with every appliance change for at least the first month to six weeks. That’s because your stoma will be shrinking during that time.
Table of Contents
Video

By playing the above video you agree to YouTube's Terms and Conditions and Privacy Policy
Who This Guide is For
Ostomates who will benefit the most from this guide are ones who have an uncomplicated, round-ish stoma that is slightly protruded.
The process is very similar for ileostomates, colostomates, and urostomates who use cut-to-fit appliances.
If you have a recessed, flushed, or prolapsed stoma, then you may not get perfect results by following this guide.
Things to Note
You would think that putting together a guide on how to measure a stoma would be pretty straight forward. Unfortunately, there are a few things that make this difficult:
Loop vs. End Ostomy
Due to the “double-barrel” nature of a loop ostomy, it may not be possible to measure the stoma using a circular guide.
If you have a loop ostomy, you may need to be creative about how you measure your stoma. One suggestion is to use a half circle, rather than the full circle of the measuring guide and measure each part (or each half) of your stoma separately. You can then trace that onto your wafer.
Every Wafer is Different
Not all wafers will act the same when they are worn. While all wafers tend to swell a bit as they come in contact with fluids or output, the degree in which they swell can differ from brand to brand.

Because of this, you may need to cut your wafer slightly larger to accommodate the expansion. Doing this also helps to prevent the wafer from “strangulating” your stoma by putting too much pressure around it.
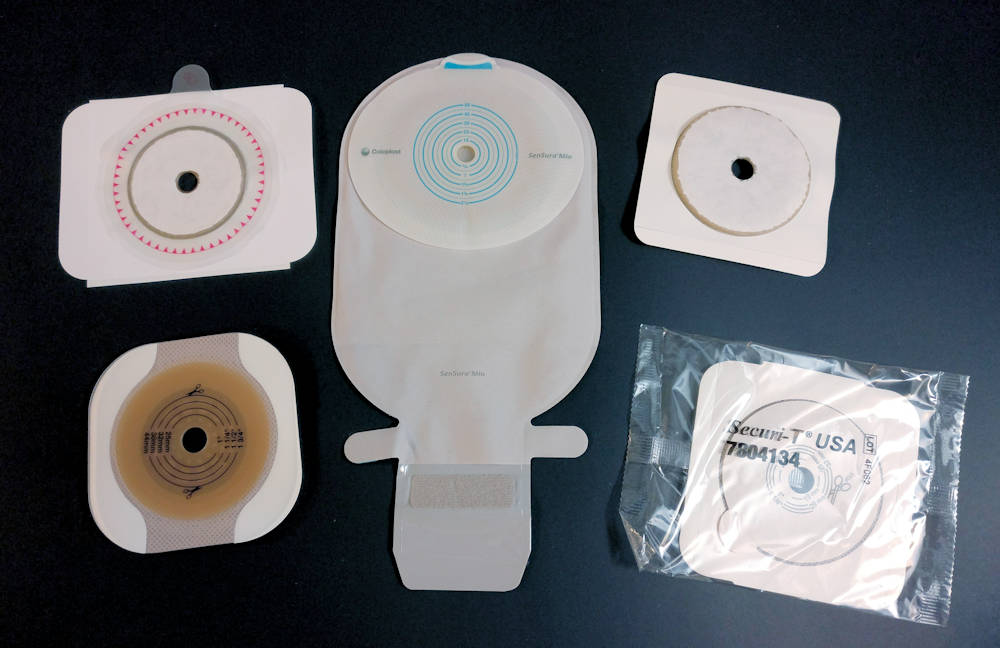
Another thing about wafers is that they come in all kinds of sizes and materials. When I buy wafers, I try to get a size that allows for about 1cm of space between my stoma and the edge of the cutting lines (or up to the flange ring on my 2pc system).
If you use a wafer that doesn’t give you enough space, you may end up having difficulties cutting it, or worse, develop leaks.
There’s no harm in getting a wafer that larger than you need, and you may be able to get more pouch support because it has more surface area to stick to.
That is, of course, provided that a large wafer fits well on your skin (there is such thing as having a wafer on that’s too big!).
Stomas Can Change
As our bodies change and so do our stomas.
It’s expected that your stoma will change its size (get smaller) for the first four to six weeks after surgery due to the swelling that occurs post-op.
Likewise, weight loss/gain can change the size and shape of your stoma, and so can things like a prolapsed stoma or a hernia.
My stoma fluctuates between 28mm and 32mm at various times, despite being over three years out from surgery. Stuff like this happens!
While you won’t able to control or predict these changes, you can make sure that your wafer is cut as accurately as possible.
Info: For more information on why stomas can change their size or shape, please refer to THIS article.
What You’ll Need
These are the supplies I like to keep on hand, but depending on the appliance you’re using, some of these won’t be necessary.
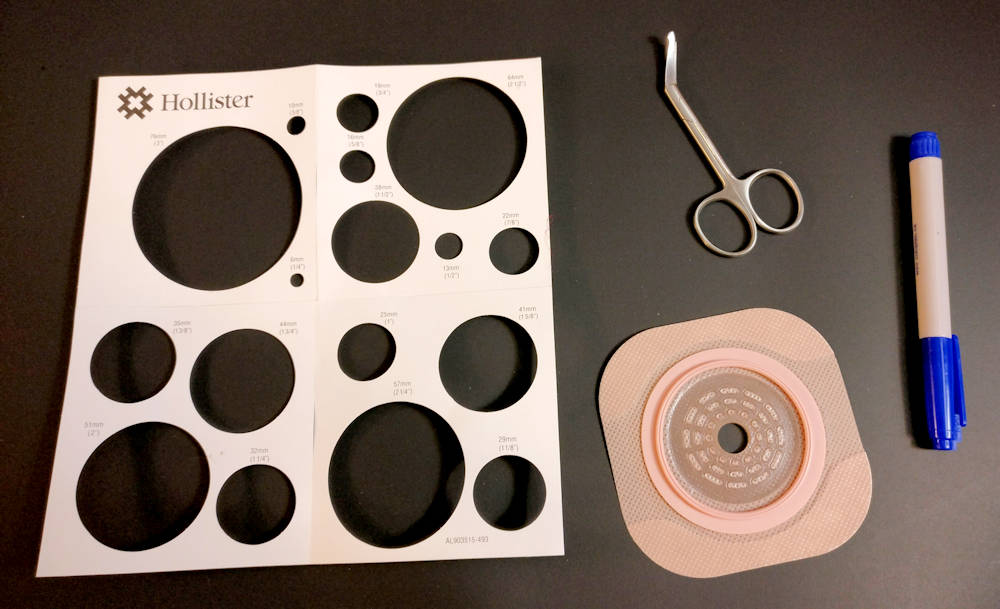
- Stoma measuring guide. If you’re using a cut-to-fit wafer, these will almost always come in the box of wafers.
- Ostomy wafer scissors (don’t use regular scissors, cuticle scissors, or anything with a sharp tip). I use and recommend THESE (Amazon affiliate link).
- Pen or marker for tracing.
- Your wafer (obviously!).
- Gauze (optional) to dry your stoma. I prefer gauze over toilet paper/paper towel because the latter tend to break apart when wet.
- Mirror (optional, but recommended). This can help to see under your stoma while measuring it.
Some wafers will come with cutting lines printed on the back, while others do not. If your stoma is a consistent size, feel free to cut the wafer according to the cutting lines without the need to measure and trace the hole.
Steps to Measuring Your Stoma
- Gather your necessary supplies.
- Empty your bag and wash your hands.
- Remove your previous wafer then shave, clean, and dry the skin around your stoma.

- Take your stoma measuring guide and find the approximate size of your stoma or use the previous measurement.
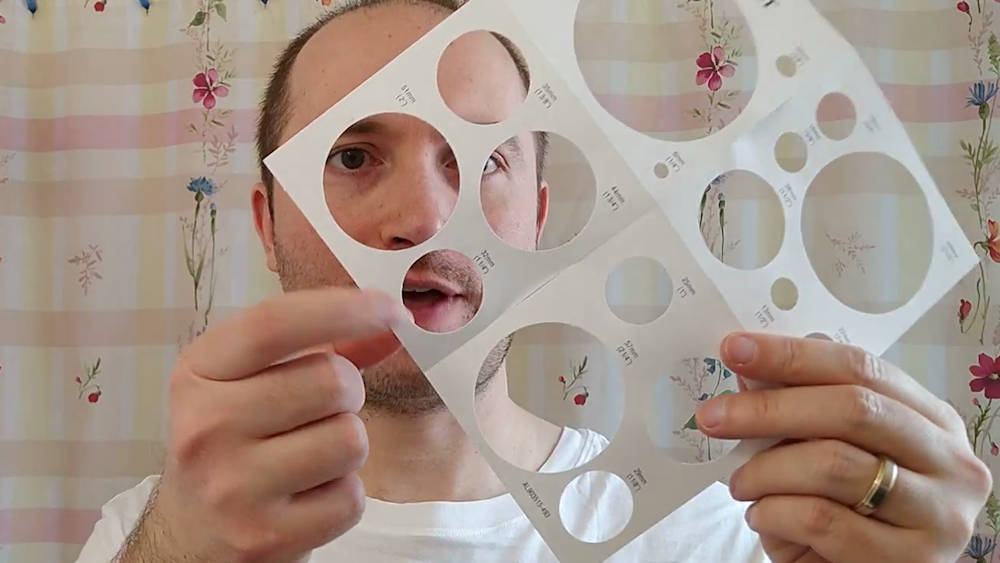
- Place the guide over your stoma so that your stoma goes through the hole.

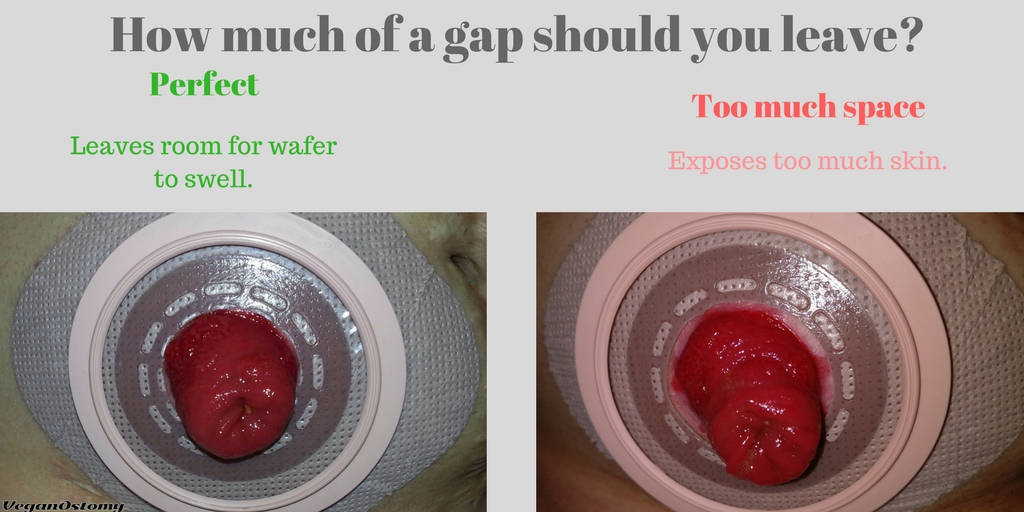
- You’ll want to make sure that there’s about a 1/16 – 1/8″ (approx. 1.5 – 3mm) gap between your stoma and the edge of the hole. Remember, as wafers do swell, you may need to adjust this gap accordingly. If you are using a barrier ring or similar product, it’s ok to cut the hole slightly larger (but not too much!).
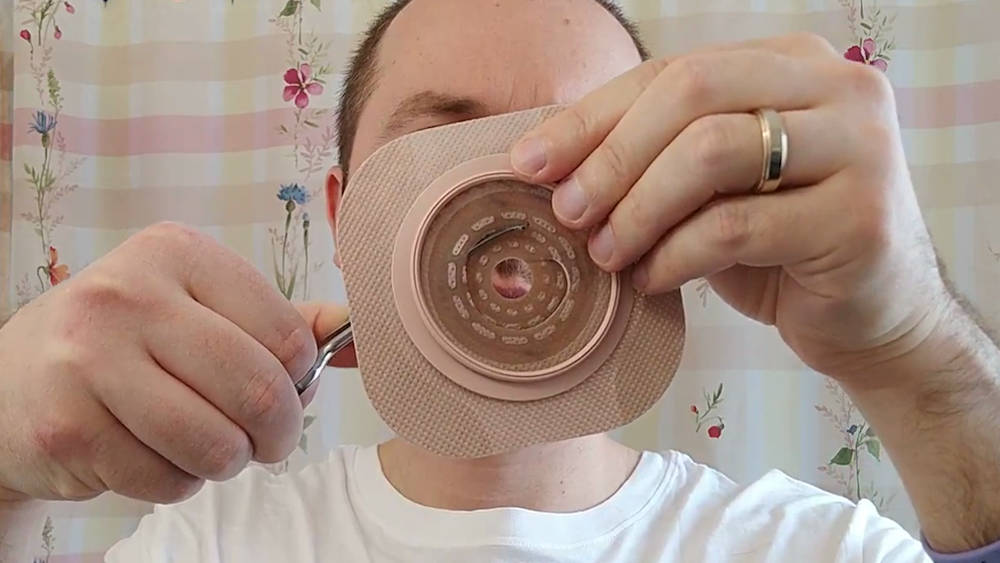
- After finding the right size, place the measuring guide on the backside of your wafer with the hole in the center of the wafer. In certain situations, like when you’ve got surgical wounds or skin problems, you may need to place the hole off-center. If you do this, just be sure that you are still cutting the hole within the boundaries of the “maximum cut” ring.

- Trace the hole on your wafer using a pen or marker.
- Cut out the hole using ostomy wafer scissors. If you are using a one-piece appliance, blow into the bag first to give some space for your scissors to move.
- Test the size of the cutout by placing it over your stoma before you remove the plastic liner on the back of your wafer. Be careful as the edge of that hole may be sharp while the plastic backing is still on.

- Make any adjustments if required.
- Complete any other skin routine, including putting on a barrier ring, ostomy paste, ostomy powder, barrier wipes, etc.
- Apply your wafer.
Tip: Keep the plastic liner from your wafer and use it as a template for your next appliance change. If your stoma stays consistent, then it will be easier to use compared to the paper measuring guides.

You can use your old release backing as a new template, but test it around your stoma to make sure it’s still the ideal size.
Final Words
I hope that this guide has given you some insight on how to measure and cut the hole for your stoma.
Feel free to make small adjustments to these steps in order to accommodate your particular needs.
Question: Do you have any tips to share about measuring your stoma?


I found that I was cutting the hole too large. The circular paper measures may not be accurate as to the actual base diameter of your stoma. My stoma is much wider above the point where it actually attaches to the normal skin. It is difficult to know this with a paper circle. At the very least. Try and dry the stoma as much as possible. Then immediately try the smallest paper circle you can estimate to fit. Get it right down to skin level. Then see if it can easily move side to side. If so. Too big a hole. Try again a size down.
This can still be difficult due to the stoma wetting the circle and making things all sloppy. I went from almost 25 mm at first, with random failures and skin irritation, down to 20 mm. That is much better now. But still is larger than I need. I still have a small area of skin exposed. I try to get that exposed area to the top when I apply the base, then put some Adapt stoma powder on the exposed skin so it gets pasted on there. That helps.
I change the appliance only once a week for many months now. I was using the 20 mm pre cut for months. But now have the 10 mm which I will cut out to fit more closely. Trying for 18 mm I guess. Also ordered a cutter. But it will get here later.
In my particular case. Using the Sensura Click 2 piece system. Getting that hole size perfected made all the difference. A couple more mm may be that last perfect fit.
We all have different skin, shape, chemistry. So your mileage may vary. But get that thing fitted up best you can.
I have a very odd shaped loop (ileostomy) stoma, it’s not even a perfect oval/oblong shape. I have learned to get it pretty close and I save the cut out piece of the wafer to draw new holes buuuuut I really wanted a more accurate template so noob tip y’all ? I found a long twist tie in my kitchen, and gently formed it around my stoma, the twist ties, when unused, have a broad flat shape which is perfect for wrapping around the base of my stoma, and it retained its shape and size when I placed it on card stock to gently trace ?? this has truly been hellish with a very short torso (hips touch ribs) even leaning forward to eat a bite over my plate bends my “flexi" wafer ?♀️ my efferent limb stoma is so low it oozes mucous right under barrier rings and I spent 2 months chasing a bloody raw ring around my stoma, tried the duoderm per the nurse LEAK, tried the brava skin prote tion sheets, LEAK, tried convatec and hollister pastes, LEAK… Tried a light convex wafer… NO LEAKS!! Buuut of course, the efferent stoma started to prolapse and squeeze out the afferent stoma ?♀️?♀️?♀️
Much more I’m leaving out… But dang it all… I MacGyver-Ed the sizing and it feels so good ??????
In all seriousness I hope this helps any of you out there with oddly shaped double stoma ? truly appreciate all of you, and site owner, for sharing and helping minister with love and info, to us scared worn and weary osteonoobs… You’ve made such a difference these last few months!
Kathi, thank you so much for sharing that idea. I love the ingenuity!
It’s pretty wild that these ostomy companies haven’t included a better system for measuring stomas in their kits. I can’t imagine that everyone has a perfectly round stoma.
Thanks again. Good luck with the rest of your challenges. It sounds like you’ve got your work cut out for you ?
Eric…did I ever tell you how much I like your shower curtain? It’s really pretty! Nice choice! I Love all your videos!
ChrisandBagpuss…excellent idea but I don’t have a printer!! If I did, my down facing D shaped stoma would have thanked you back then. I admit, I found the " pie " method worked great for me.
Eric….I thought my scissors were good too until I got a new pair! lol! I had a nurse in a Hospital apt. exchange my old for a new pair… I was very grateful! To bad they don’t implement a program of some kind for replacing scissors.
ShielaBillings & Pat Thomas… I hope you can find a good fit and a measuring system that works for you! When my stoma changed shape after 6 or 7 years I was very surprised! I think it was due to weight loss for me. Using my pie method on page one was quick & relatively simple but I think ChrisandBagpuss has a great idea too. The right scissors with the round tip, meant I stopped putting teensy cuts in the plastic because it lifted the plastic away from the scissors better! Good Luck!!!
Can you give me the # for the Coloplast scissors that you recommend in this video
Hi Pat, those scissors are the Coloplast 6295050. Been using mine for over 7 years and they still cut like new!
@Pat Thomoson
You might find your ostomy supplier or even your nurse will give you a free (Sample) pair
I asked cololast and they sent me an extra complementary set for my emergency kit ;-)
I have already put on the site but as its a very useful way I hope you agree its good to repeat again.
If you have a digital camera or good phone camera take a photo of your stoma and print it out at 100% that should come out at a one to one actual size. To check’ if you put a ruler or tape measure alongside you stoma when you take the picture, you can then lay the actual measure on top of the print out if they match you good to go.
Cut out the image of your stoma you then have a perfect pattern of your stoma, don’t forget to cut slightly wider to account for a 1-2mm gap around your stoma.
This method is much easier that trying to trace a cutout.